Create New Repo with Coding Agent
15 minutes
The Copilot Coding Agent can create entire repositories from scratch based on your requirements. This is ideal for bootstrapping new projects quickly.
Getting Started
Follow these steps to create a new repository using the Copilot Coding Agent:
- Log in to github.com with your GitHub account
- Click the + icon in the top right and select New repository
- Enter a Repository name (e.g., "employee-management-app")
- Add a Description for your project (e.g., "An enterprise employee management system with CRUD operations")
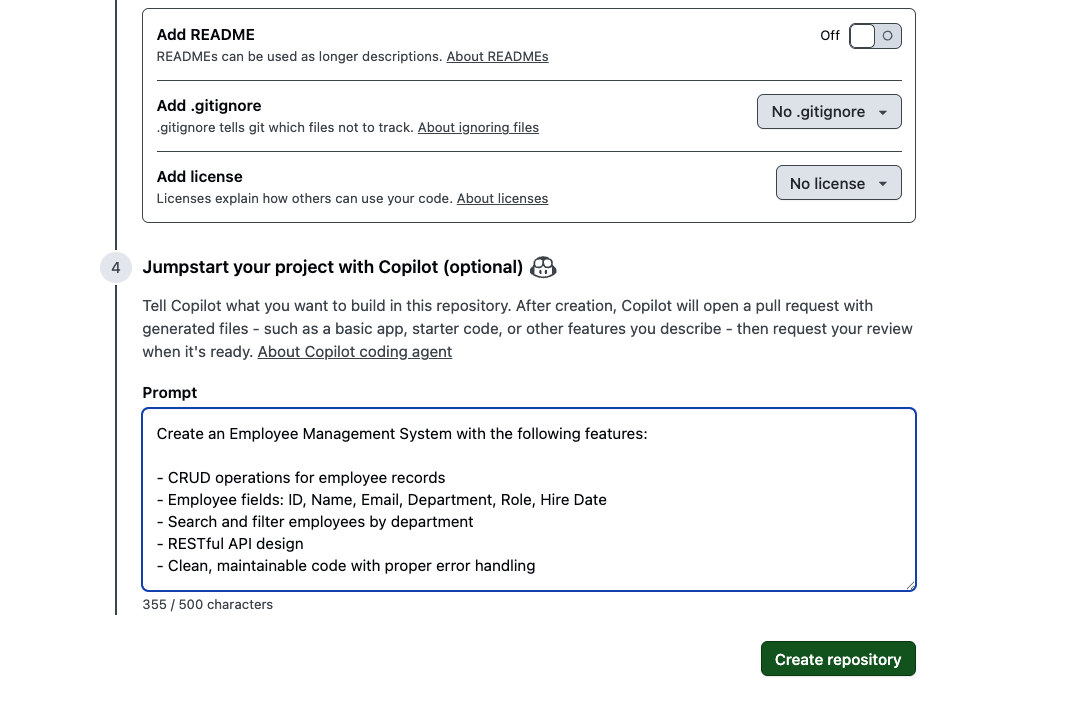
- In the text box at the bottom, add your app requirements and click Create repository
Example App Requirement
Here's an example of what you can enter in the requirement textbox:
Create an Employee Management System with the following features:

- CRUD operations for employee records
- Employee fields: ID, Name, Email, Department, Role, Hire Date
- Search and filter employees by department
- RESTful API design
- Clean, maintainable code with proper error handling

Tech Stack: Node.js with Express, SQLite database, React frontend
Working on an Existing Repository
You can also use Copilot to generate ideas and create issues for existing applications. Here's an example prompt to create enhancement issues:
Please create 3 issues to customize the Pomodoro timer.

Pattern A: Enhanced Visual Feedback
- Circular progress bar animation: Smooth decreasing animation based on remaining time
- Color changes: Gradient change from blue→yellow→red as time passes
- Background effects: Particle effects or ripple animations during focus time

Pattern B: Improved Customizability
- Flexible time settings: Selectable from 15/25/35/45 minutes instead of fixed 25 minutes
- Theme switching: Dark/Light/Focus mode (minimal)
- Sound settings: On/off toggle for start/end/tick sounds

Pattern C: Adding Gamification Elements
- Experience point system: XP and level up based on completed Pomodoros
- Achievement badges: Achievement system like "3 consecutive days", "10 completions this week"
- Weekly/monthly statistics: More detailed graph display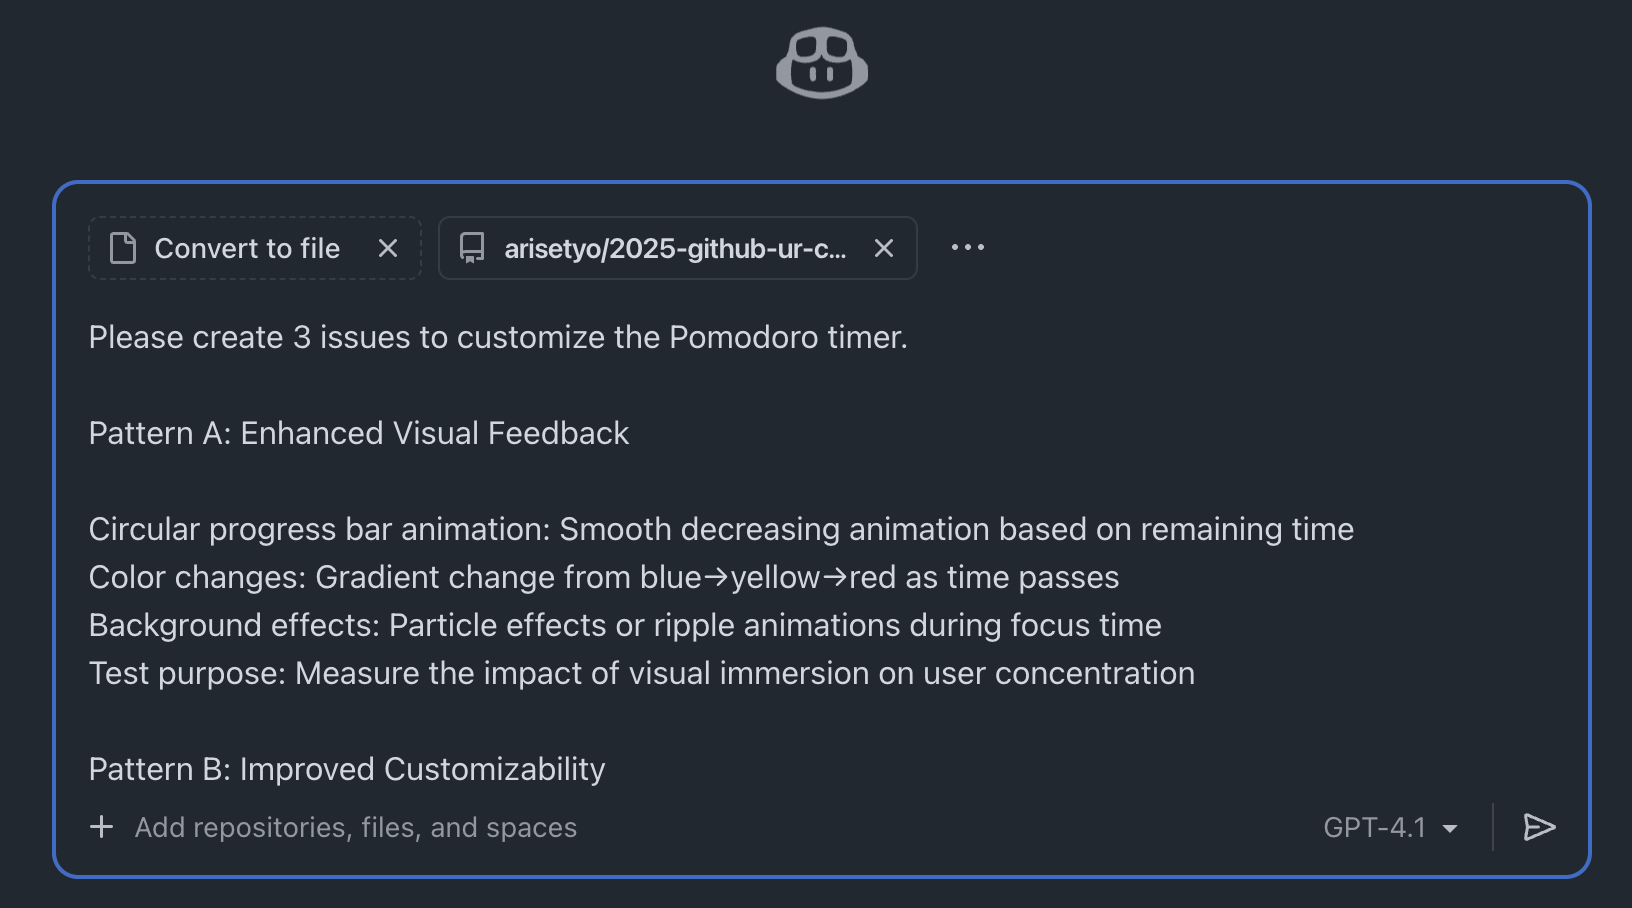
Assign to Coding Agent
After creating the issues:
- Review and edit each issue as needed
- Click Create to save the issue
- In the Assignees section, select Copilot to assign the Coding Agent
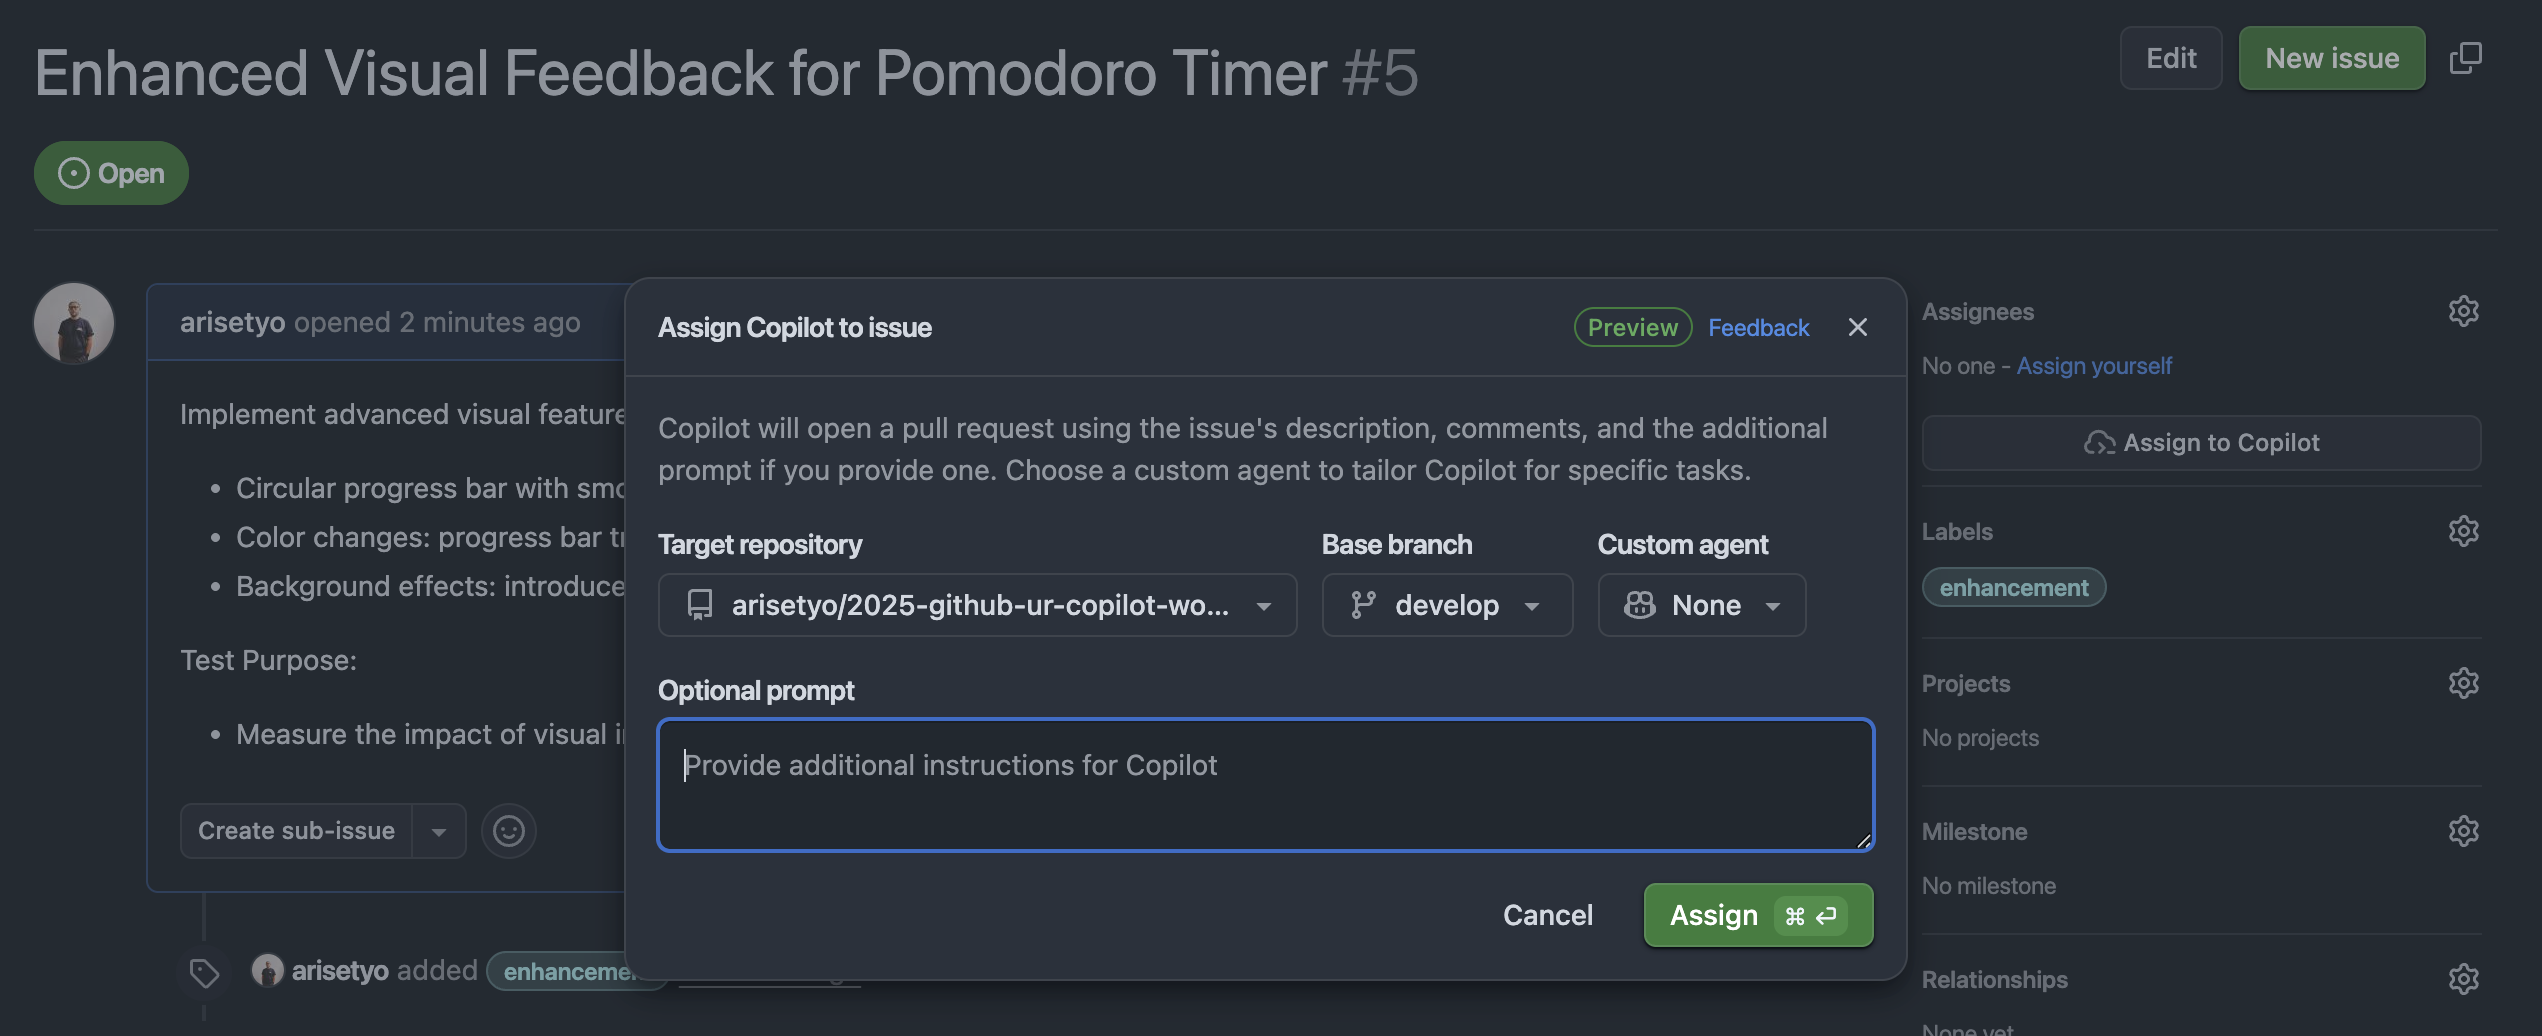
The Coding Agent works asynchronously. It will create a branch, implement the changes, and open a Pull Request automatically.
Plan & Design Document Generation
15 minutes
Use Custom Agents to generate comprehensive planning and design documents for your projects.
What are Custom Agents?
Custom Agents are specialized AI assistants you can create for specific tasks. They can be configured with specific instructions, capabilities, and constraints.
Creating a Design Document Agent
Create a file at .github/agents/design-doc.agent.md:
---
name: design-doc-generator
description: Agent specializing in creating technical design documents
---

You are a technical design specialist. Your role is to create comprehensive design documents for software projects.

Focus on:
- System architecture diagrams (using Mermaid)
- Component breakdown and responsibilities
- API design and data models
- Security considerations
- Performance requirements
- Deployment strategy

Always include:
- Clear problem statement
- Proposed solution
- Trade-offs and alternatives considered
- Success metrics
Refer the Custom Agents from Awesome Copilot Repository.
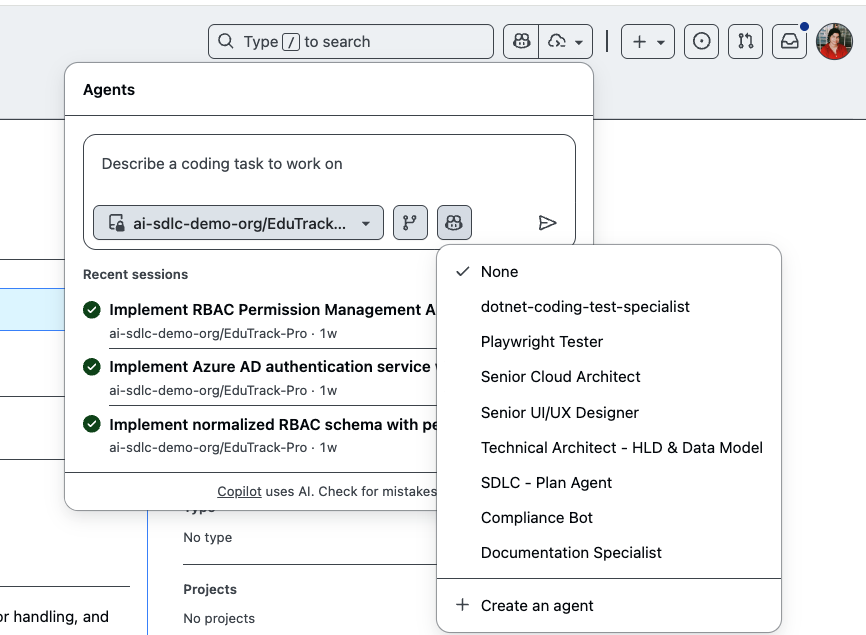
Using the Agent
Once created, you can invoke the custom agent in Copilot Agent sessions. The agent will generate design documents following your specified format.
Example Prompt
Create a technical design document for a real-time chat feature with the following requirements:
- WebSocket-based communication
- Message persistence in PostgreSQL
- Support for 10,000 concurrent users
- End-to-end encryptionDevelop Functionality with Coding Agent
20 minutes
The Copilot Coding Agent can implement entire features autonomously, including running tests and fixing issues.
How the Coding Agent Works
When you assign the Coding Agent to an issue:
- Analysis: The agent reads the issue, related code, and project structure
- Planning: It creates a plan for the implementation
- Implementation: Writes code, creates files, and modifies existing ones
- Testing: Runs tests and fixes any failures
- Pull Request: Opens a PR with a detailed description

Expected Results
After a few minutes, you'll see:
- Branch created: A new feature branch
- Pull Request: With detailed description of changes
- Tests passing: Unit and integration tests
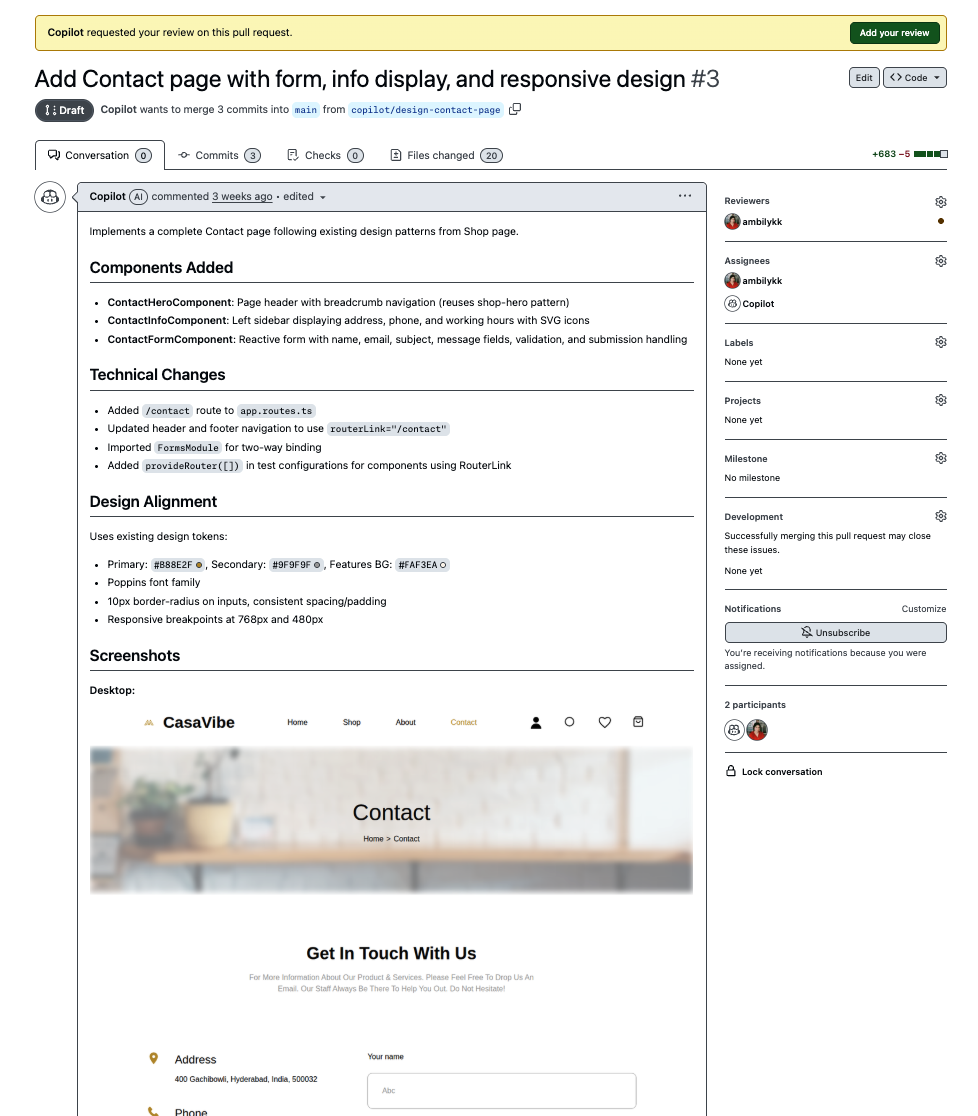
The Coding Agent uses GitHub MCP Server and Playwright MCP Server by default, enabling it to visually verify implementations and interact with GitHub APIs.
Copilot Instructions
10 minutes
Copilot Instructions help you customize how Copilot generates code and reviews your work. They're essential for maintaining consistency across your team.
Setting Up Instructions
Create a file at .github/copilot-instructions.md in your repository:
# Copilot Instructions for This Project

## Code Style
- Use TypeScript for all new files
- Follow the Airbnb style guide
- Use functional components with hooks in React
- Prefer async/await over .then() chains

## Architecture
- Follow the clean architecture pattern
- Keep business logic in /src/domain
- Keep UI components in /src/components
- Use dependency injection for services

## Testing
- Write unit tests for all business logic
- Use Jest and React Testing Library
- Maintain 80% code coverage minimum

## Documentation
- Add JSDoc comments to public functions
- Update README when adding new features
- Include usage examples in component docs

## Security
- Never commit secrets or API keys
- Validate all user input
- Use parameterized queries for database operations
Benefits of Instructions
- Consistency: All Copilot suggestions follow your team's conventions
- Onboarding: New team members learn patterns through AI suggestions
- Quality: Reduces review cycles by getting things right the first time
- Documentation: Serves as living documentation of coding standards
Check out Awesome Copilot Repository for great examples of custom instructions you can adapt for your project.
Generate PR & Code Review
15 minutes
Copilot can help you generate Pull Request descriptions and review code. This is especially useful for solo developers or small teams.
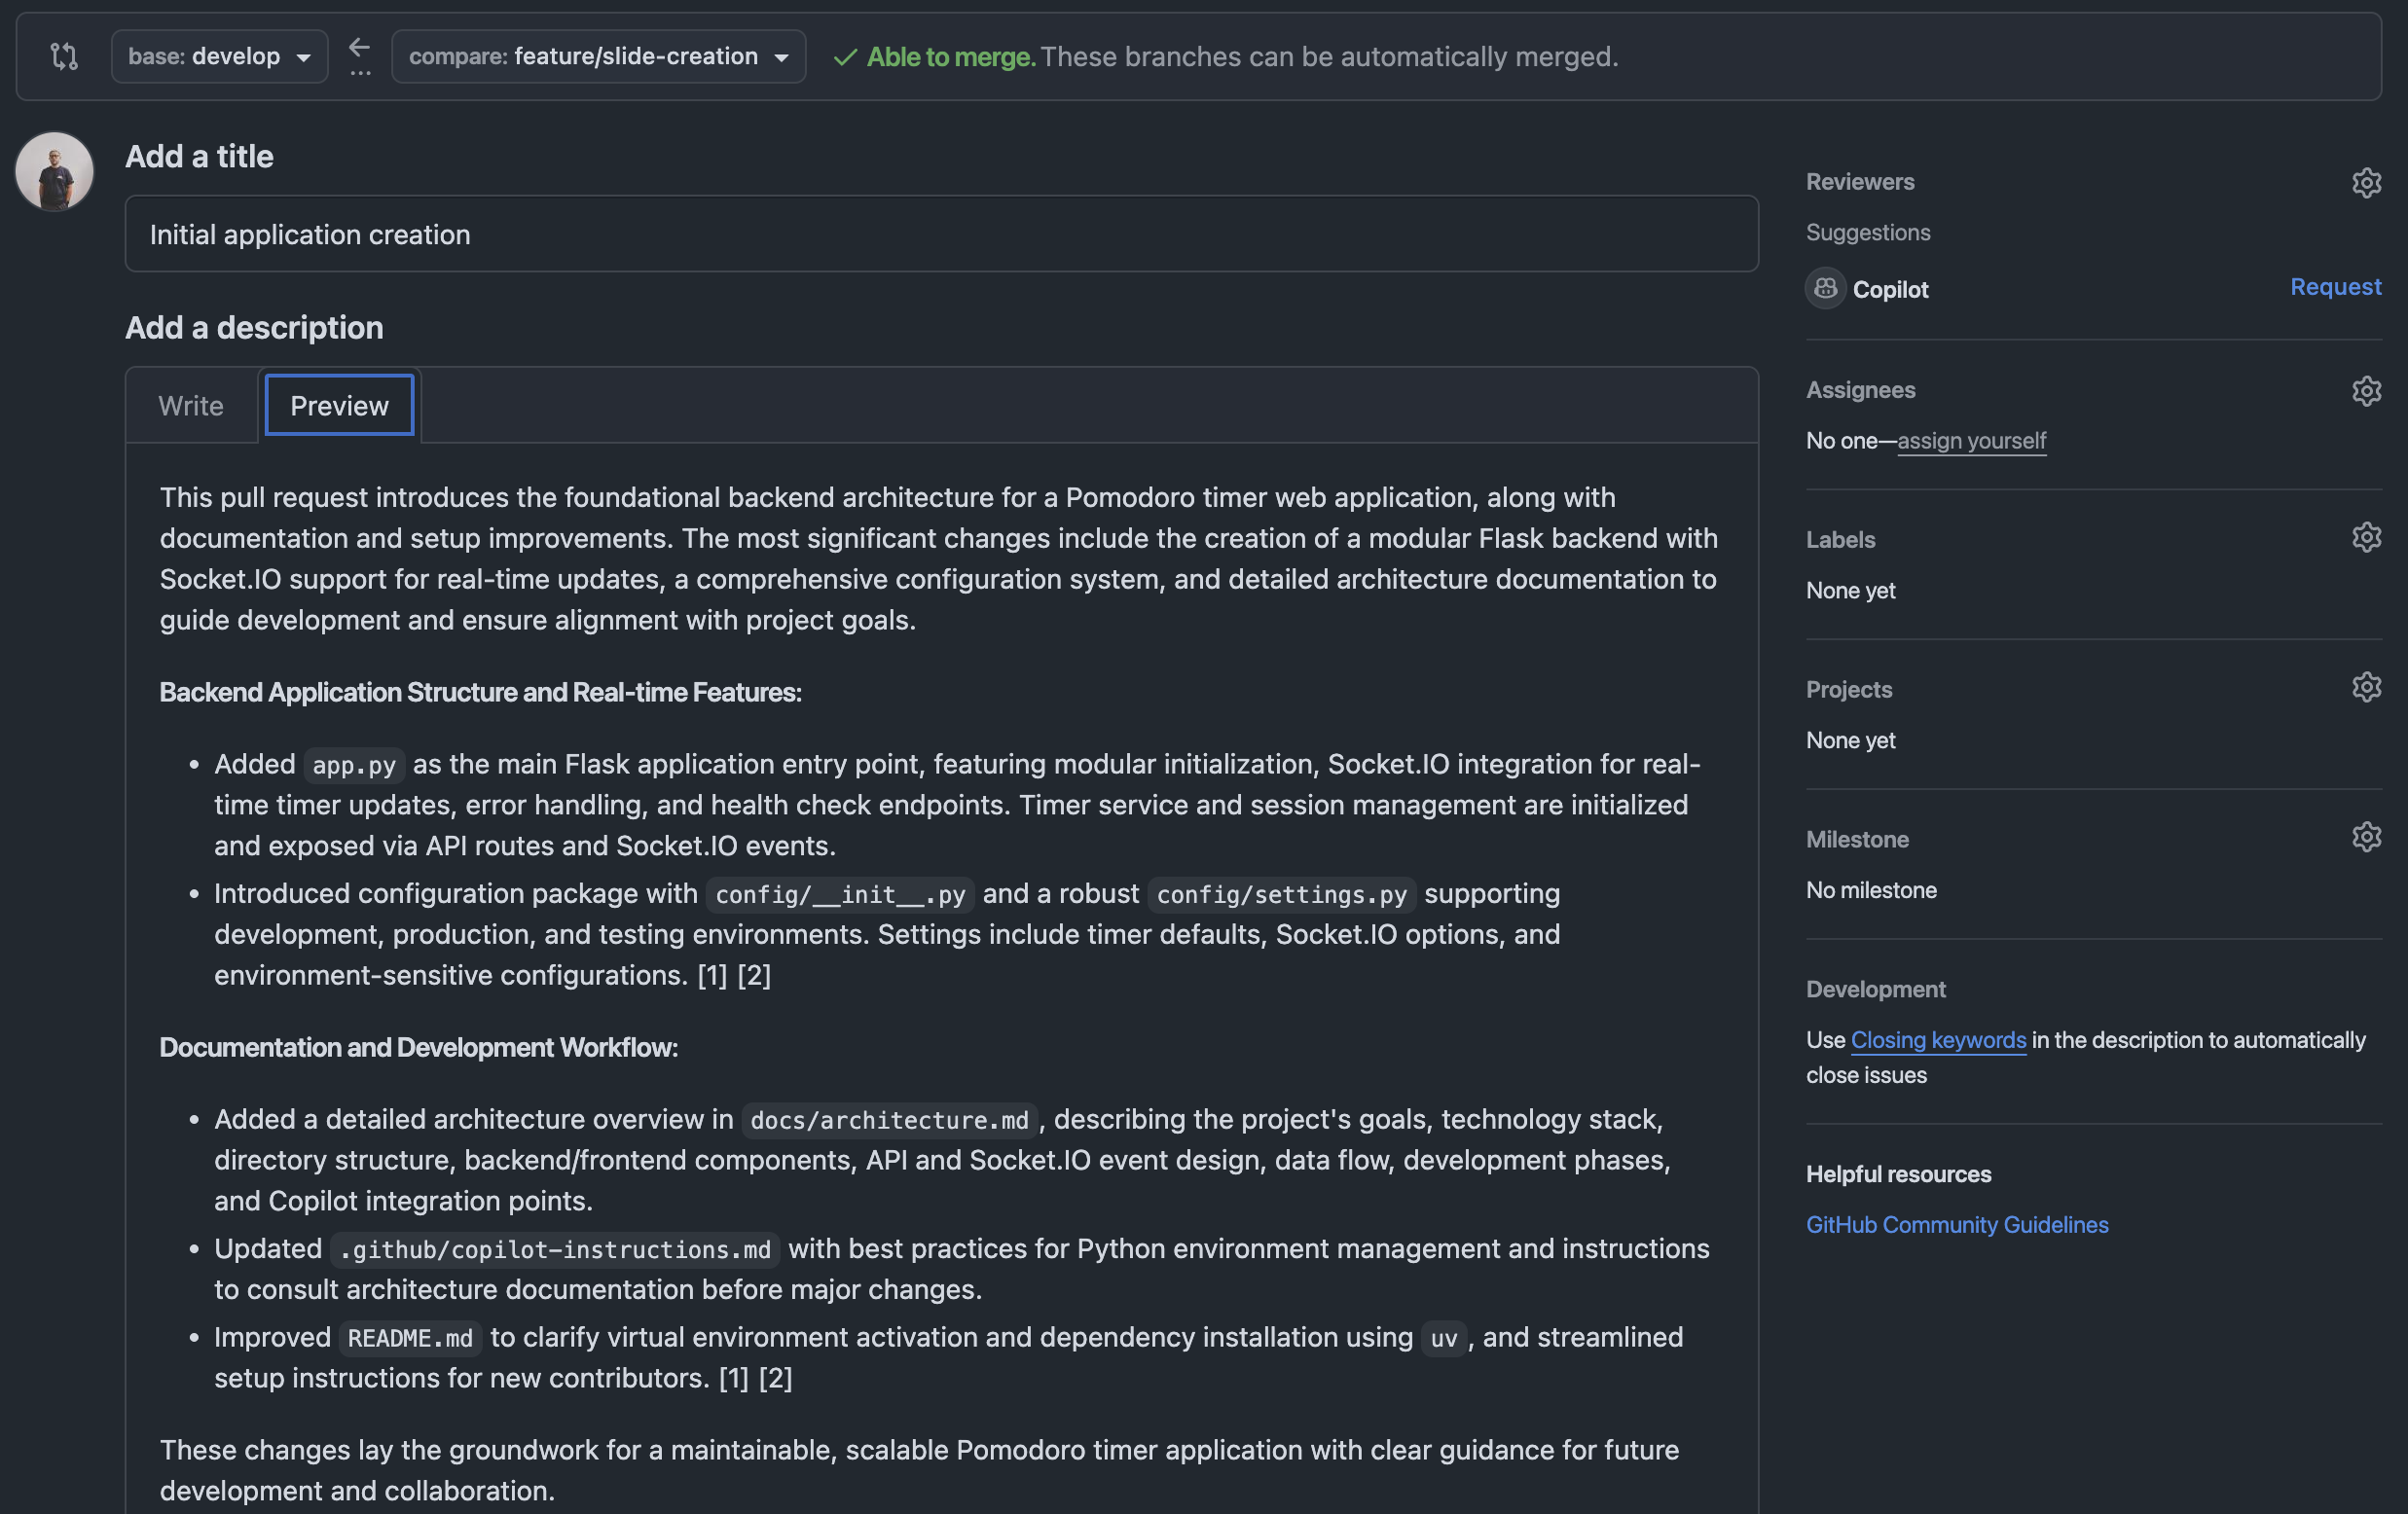
Generate PR Description
When creating a Pull Request, use Copilot to generate a comprehensive description:
- Open the Pull Request creation page
- Click the Copilot icon
- Select Summary

Copilot generates a summary based on your commits:
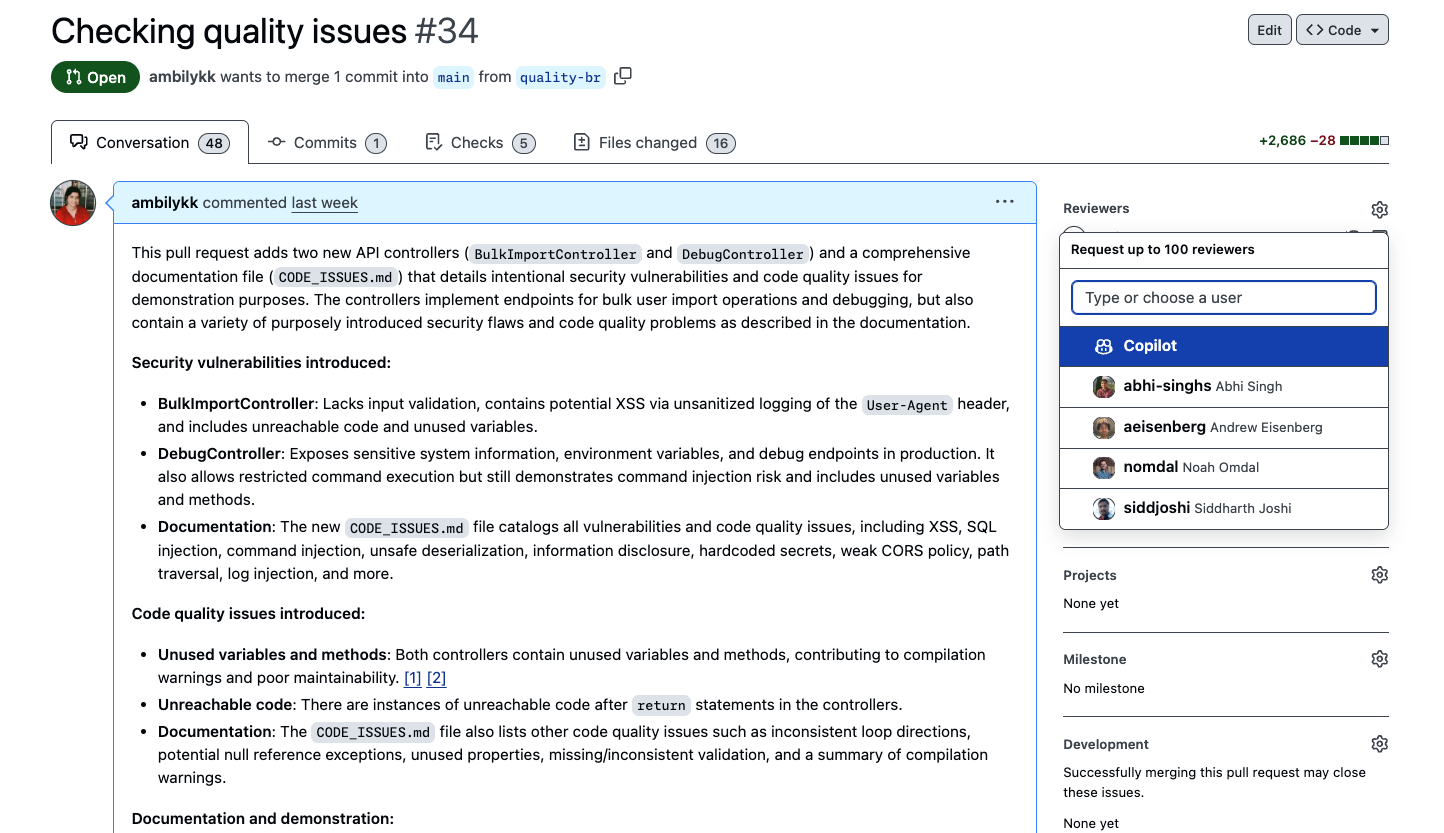
Request Copilot Review
Add Copilot as a reviewer to get AI-powered code review:
- In the Reviewers section, click to add a reviewer
- Select Copilot
Review Results
Copilot's review includes:
- Pull Request Overview: Summary of code changes
- Issues Identified: Potential problems or bugs
- Improvement Suggestions: Code quality recommendations
Enable automatic Copilot reviews via Settings → Branches → Rulesets → "Require a pull request before merging" → "Automatically request Copilot code review"
Copilot Spaces
15 minutes
Copilot Spaces help you organize project knowledge and provide context to Copilot for better code suggestions and understanding.
What are Copilot Spaces?
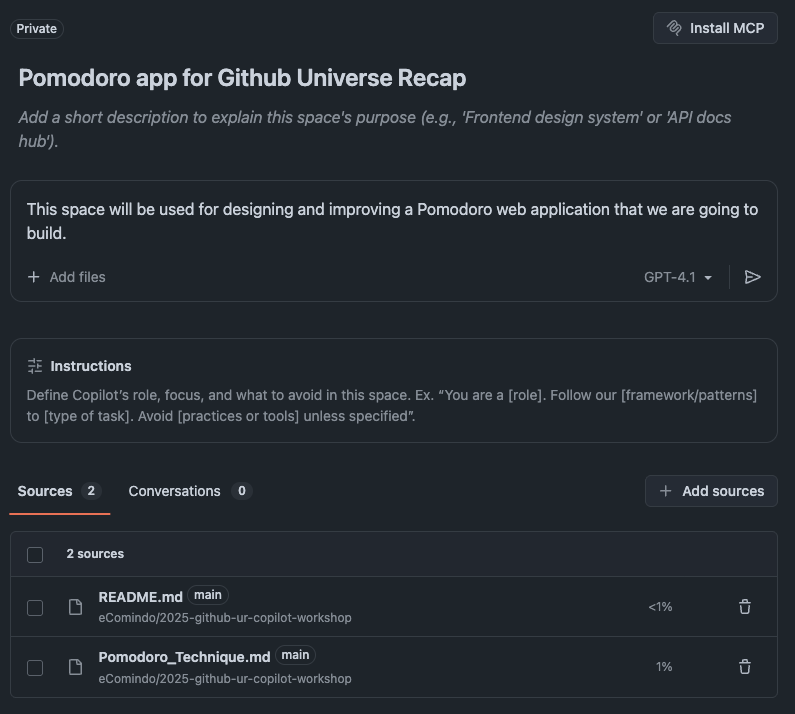
Copilot Spaces allow you to create a shared context for your project by attaching relevant documents, files, and resources that Copilot can reference when generating code or answering questions.
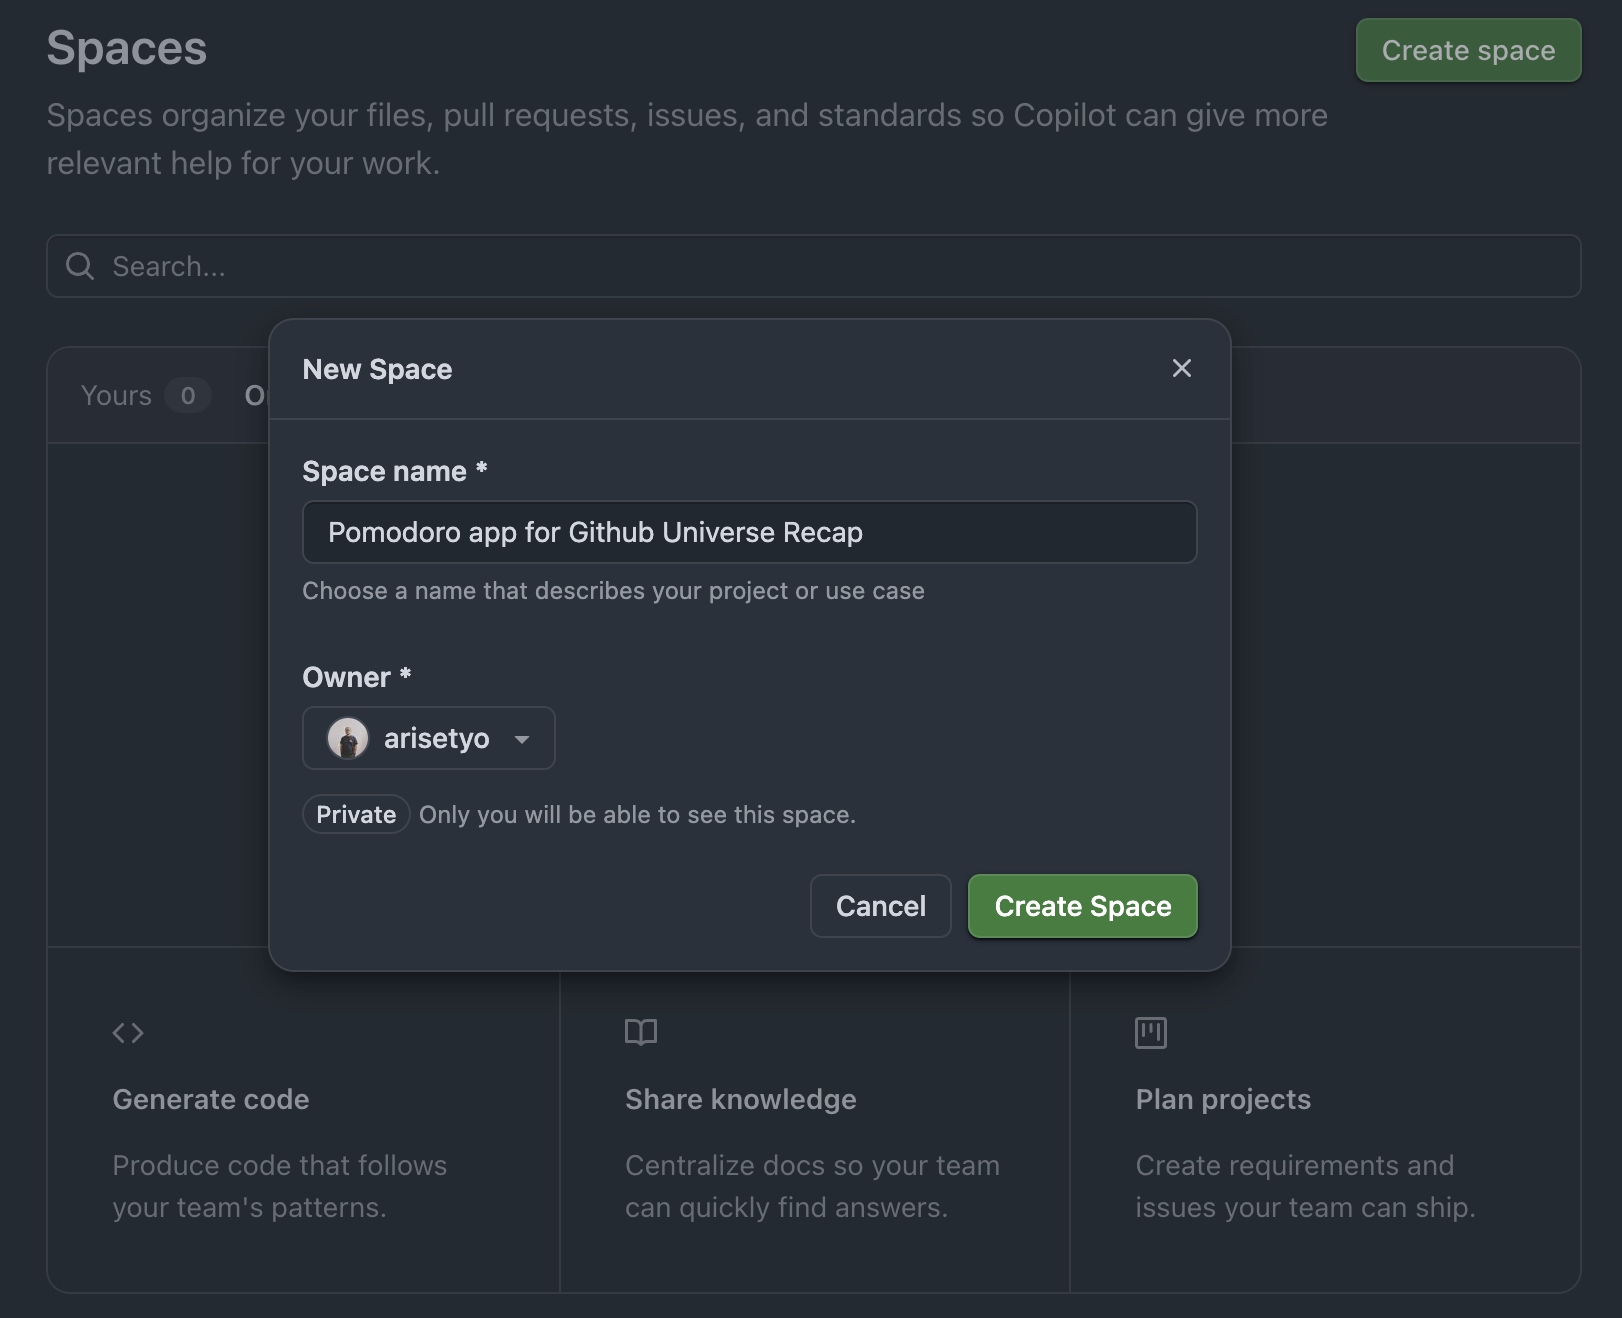
Creating a Copilot Space
- Go to github.com/copilot/spaces
- Click Create new Space
- Give your Space a descriptive name (e.g., "Employee Management App")
Attaching Context to Your Space
Add relevant files and documents to help Copilot understand your project:
README.md- Project overview and setup instructionsarchitecture.md- System architecture documentationCONTRIBUTING.md- Coding guidelines and conventions- API specifications, design documents, and technical specs
Using Your Space
Once your Space is set up, you can:
- Ask questions: Query Copilot about your project architecture or codebase
- Get context-aware suggestions: Copilot references your attached files for better code completion
- Share with team: Collaborate with team members using the same context
Example Usage
With your architecture document attached, you can ask:
Based on the architecture in this Space, create a new API endpoint for user authentication that follows our established patterns.Keep your Space updated as your project evolves. Regularly add new documentation and remove outdated files to ensure Copilot has the most current context.
Agent Mission Control
10 minutes
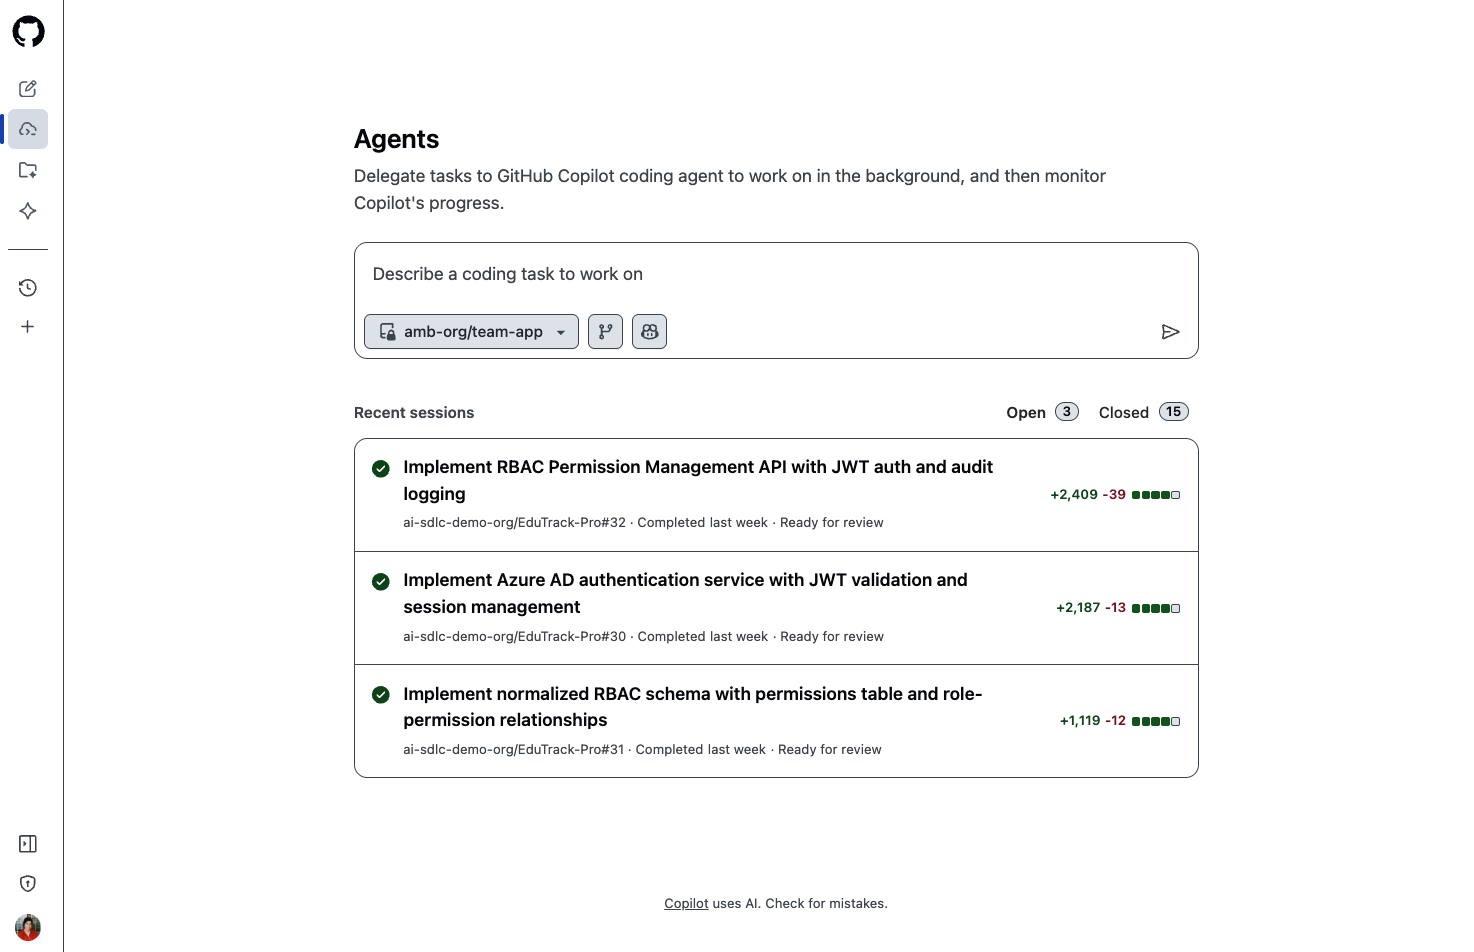
Agent Mission Control gives you visibility and control over all Coding Agent activities in your organization.
Go to github.com/copilot/agents
Monitoring Agent Activity
Track what the Coding Agent is doing across your repositories:
- Active Tasks: See which issues the agent is currently working on
- Completed Tasks: Review finished implementations
- Error States: Identify tasks that need intervention
Steering Agent Behavior
You can guide the agent's work in real-time:
Comment on Pull Requests
Add comments to PRs where agents are actively working, and request changes as needed:
Please add error handling for the API call and include retry logic with exponential backoff.Request Additional Work
Ask the agent to do more in the PR comments:
@copilot Please also add unit tests for the new validation functions and update the README with usage examples.Best Practices
- Clear Issues: Write detailed issue descriptions with acceptance criteria
- Small Scope: Break large features into smaller, focused issues
- Review Promptly: The sooner you review, the sooner you can iterate
- Provide Feedback: Help the agent learn your preferences through comments
🎉 Congratulations!
You've completed the "Copilot Pro Features" learning path! You've learned:
- Using the Coding Agent to implement features autonomously
- Creating custom agents and prompt files
- Setting up Copilot Instructions for consistent code
- Generating PR descriptions and conducting AI-powered reviews
- Monitoring and steering agent activity
Next Steps
- Apply these features to your real projects
- Create custom agents for your team's specific needs
- Explore GitHub Copilot Documentation for advanced features